Winter Wonderland Cake with Double Chocolate Frosting

I don’t mean to brag, but I am a frosting connoisseur!
I don’t know how it is possible that I have gone this long in my life without coming up with a chocolate buttercream recipe. When I make chocolate frosting, I usually use my mom’s recipe for Sour Cream Chocolate Frosting, and it is absolutely one of my favorites, but I wanted to create a recipe that was a bit easier to make and more of a buttercream style. Buttercream is great for decorating cakes, cookies, and cupcakes. I have been on a hunt for a great chocolate buttercream recipe, and in my search have found that most people use just cocoa powder. I’m not completely sure why I had in my head that I wanted to use melted chocolate, maybe because that is what I use in the chocolate sour cream frosting, but I knew that I wanted a really rich and deep chocolate flavor. Sooooo why not use both!? That is what I did, and I created the BEST double chocolate frosting that is super easy to make.
When I buy cocoa power, I really like to find the “dutch processed,” because it has a much smoother taste. Cocoa powder by nature is more acidic, so the dutch process means that it has been treated with alkali to make it pH neutral. The pH doesn’t matter when it comes to the frosting, besides how it affects the flavor. It does, however, matter when you are baking with the cocoa powder, because that if change how much leavening you add to your baking. So, when you are following a recipe, make sure to pay attention to whether or not it calls for a certain kind of cocoa powder.
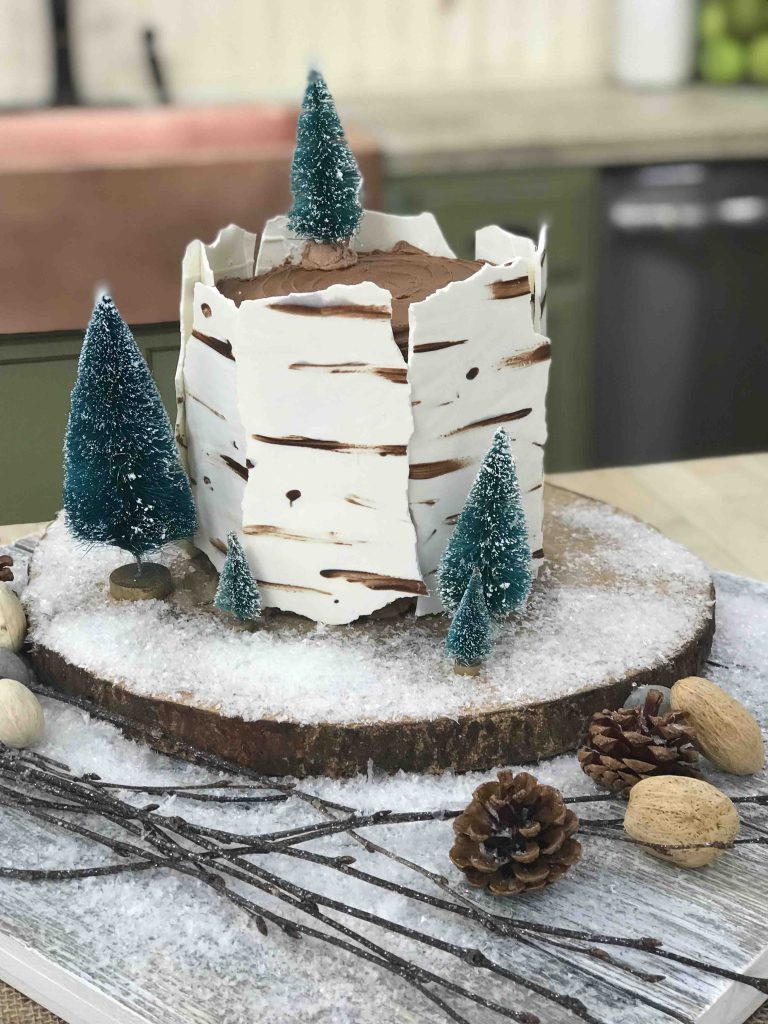
Now, to make this beautiful Winter Wonderland Cake, all you need is some white candy coating chocolate, dark candy coating chocolate, and a paint brush! It is so simple. Full step out tutorial below.


Winter Wonderland Cake with Double Chocolate Frosting
Author:
Maria Provenzano
Ingredients
-
Ingredients for Chocoalte Frosting
-
1 cup unsalted butter; room temperature
-
1 pound powdered sugar
-
3 tablespoons cocoa powder; preferably Dutch processed
-
6oz semi-sweet chocolate melted and cooled (milk and dark chocolate could be used as well)
-
About 1/4 cup half and half (whole milk works too); room temperature
-
1 teaspoon vanilla extract
-
Ingredients for Birch Tree Chocoalte
-
White Candy Coating Chocolate
-
Dark Candy Coating Chocolate
-
Wax or Parchment Paper
-
Large Baking Sheet
-
Offset Spatula
-
Small Paint Brush (tip: use one specifically for baking and not other projects)
Instructions
-
Directions for Frosting
-
Use a stand mixer with a whisk attachment (and hand mixer works as well) and beat the butter on medium speed to lighten it a bit
-
In another bowl, combine the powdered sugar with the cocoa power using a whisk
-
Add the powdered sugar/cocoa mixture into the butter, and carefully start to mix; once it starts to come together then you can raise the speed to medium
-
Slowly add the vanilla and some of the half and half so that it starts to come together and become smooth
-
Scrape down the sides of the bowl and then add the melted and cooled chocolate; mix together on medium speed to incorporate the chocolate well
-
Add more half and half of the frosting seems too thick; you are looking for a smooth, spreadable consistency
-
Note: It is important that all ingredients are room temperature, otherwise chocolate will seize up and not mix in
-
Directions for Cake
-
Lay the wax paper out onto a baking sheet
-
Melt the two chocolates in a double boiler or microwave
-
Use the paint brush to create lines like a birch tree, look for pictures online as a reference if needed
-
Allow the dark chocolate to harden (you can even place it in the fridge for a few minutes)
-
Then, cover the the design with a layer of white chocolate, it helps to use an offset spatula to spread it around
-
If it isn’t thick enough, place the baking sheet in the fridge to harden, then apply another layer of white chocolate over it again
-
You want the layer of chocolate to be thick enough to work with but thin enough to be able to break easily into the shapes you want
-
Allow to harden in the fridge
-
How To Build the Winter Wonderland Cake
-
Frost the cake
-
Break the chocolate into long strips and carefully peel away from the wax paper
-
Apply the birch bark chocolate pieces to the cake soon after frosting it so that the chocolate sticks well to the cake; the frosting is the glue
-
Add adornments if desired (mini pine trees and deer)
-
It also looks nice to create a circular design at the top of the cake with the offset spatula to look like a cut tree
-
Sprinkle additional powdered sugar over the cake to add a snowy appearance if desired
I’m the farthest thing from a cake decorator, but this cake is beautiful and intrigues me! Is it a double layer cake under all that gorgeous frosting?
Yes! you can use any cake recipe you like 🙂 You can definitely make this!
I’m the farthest thing from a cake decorator, but this cake is beautiful and intrigues me! Is it a double layer cake under all that gorgeous frosting?
Yes! you can use any cake recipe you like 🙂 You can definitely make this!