Yarn Art on The Hallmark Channel’s Home and Family Show

Today on The Hallmark Channel’s Home and Family Show I am creating DIY Yarn Wall Art!
You can create so many beautiful things with yarn, it is amazing! I simply used dowels, sticks, and macrame rings for the wall decor. I also created beautiful Yarn Nail art by tracing a picture, then hammering nails into the board, and wrapping yarn around the nails. These are really fun, and inexpensive projects that anyone can do!
DIY Yarn Art
Wall Hangings:
Supplies:
Macramé ring, a dowel, or a stick
Yarn
Fabric scissors
RIT dye; optional for a dip dye look
Directions:
Cut the yarn the desired length
Fold the yarn in half, and make a larks head knot around the ring, dowel, or stick; do this by creating a “U” shape at the base of the ring, dowel, or stick, and pull the hanging “legs” through the “U” shape
Pull to tighten and a topknot is created
Repeat with as many colors as desired
Use fabric scissors to cut the bottom of the yarn to make a straight line or an angled line
Dip in the dye if desired; mix according to package instructions
Tips:
*Plan on using a good amount of yarn, since it looks much nicer when it is more full
*Cut all of the yarn first to make sure they are the same size
*Make sure to use fabric scissors in order to make clean lines, and so that the yarn does not fray
DIY Tassel:
Supplies
Yarn
Fabric Scissors
A square of cardboard the desired length of the tassel
Directions:
Wrap the tassel around the length of the cardboard until desired thickness is achieved
Cut the yarn from the large roll of yarn
Cut an additional small piece of yarn, about 2-3 inches; wrap the small piece of yarn around the top of yarn that is wrapped around the cardboard and tie in a knot, and use fabric scissors to cut the opposite side of the cardboard; this way one side is tied and one side is cut (it will look like a bunch of yarn folded in half with a string around the center
Cut an additional piece of yarn, about 2-3 inches, and wrap it around where other piece of yarn is keeping everything together to create a small puff at the top; this created the tassel look
Tips:
*If making multiple tassels, make sure to count how many times you wrap the yarn around the cardboard to make sure each one is the same size.
*It helps to hold the wrapped yard at all times to be sure it does not come apart.
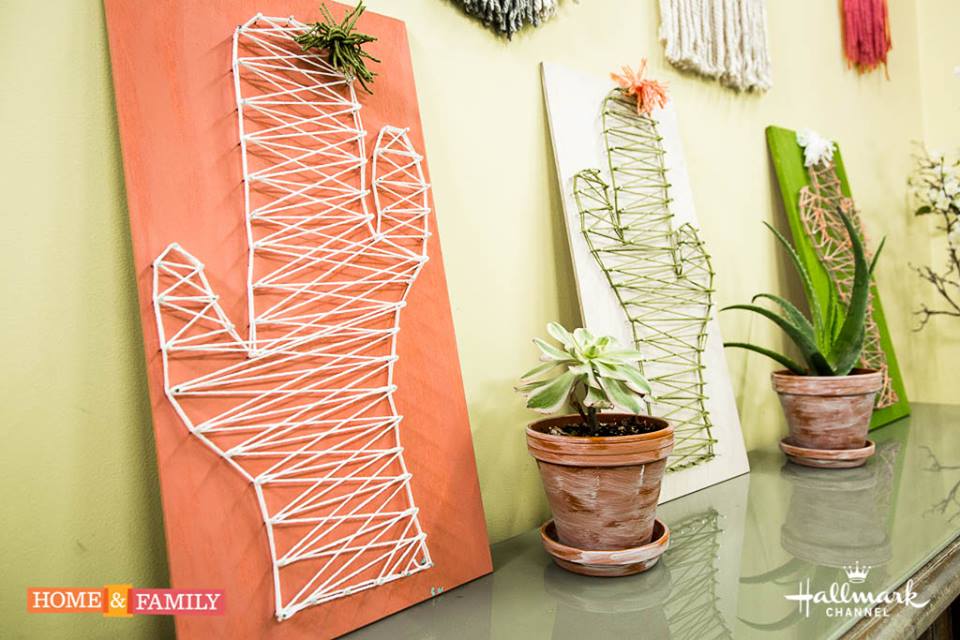
Nail Yarn Art:
Supplies
Small Nails
Plywood
Yarn
Hammer
Pencil with eraser to draw the design
Directions;
Use the pencil to draw your desired design; you can also trace a design printed out on your computer; do this very lightly
Hammer in a nail about every 1-inch in your design
Use the eraser to get rid of the rest of the pencil marks
Tie the yarn onto one nail by making a couple knots to make it secure, then use the yarn to wrap around each nail to create the design with the yarn doing the outline first
Once outlined, go back and forth between the sides to fill the design of desired
Once finished, tie a couple knots onto one of the nails and cut away the excess yarn