DIY Fringe Chandelier
DIY Fringe Chandelier
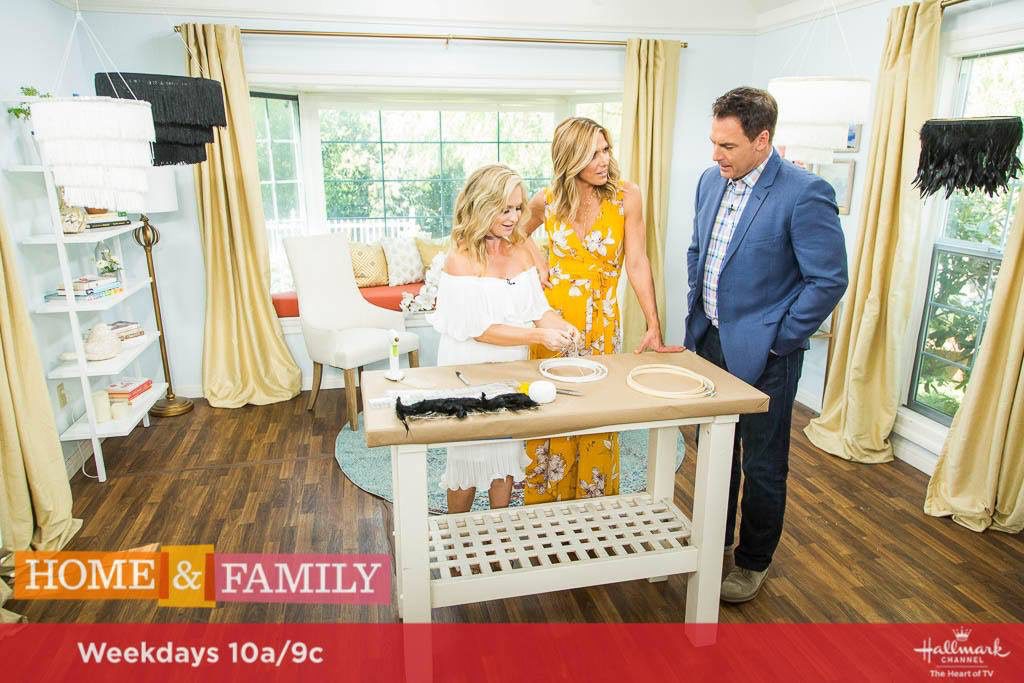
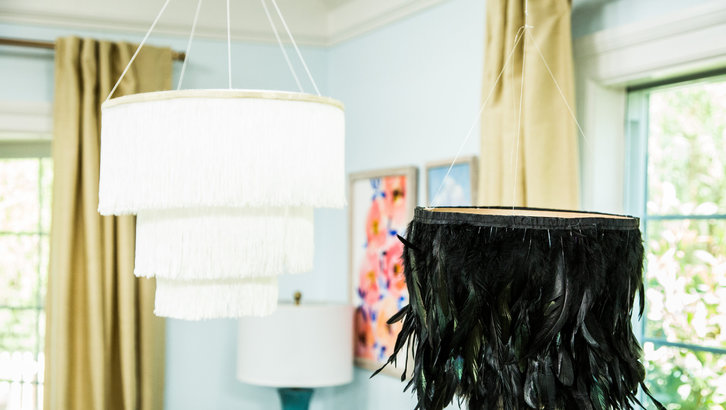
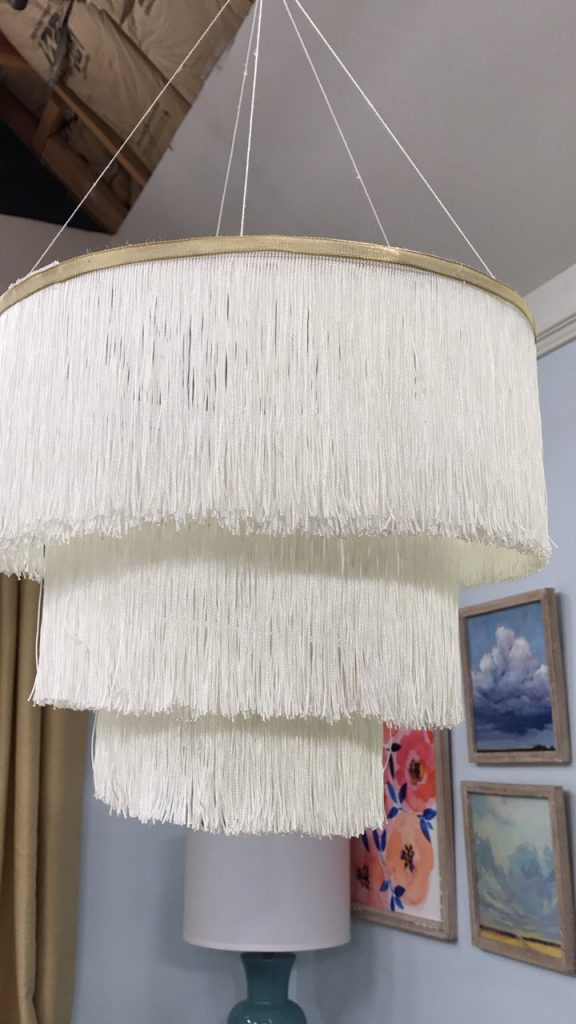
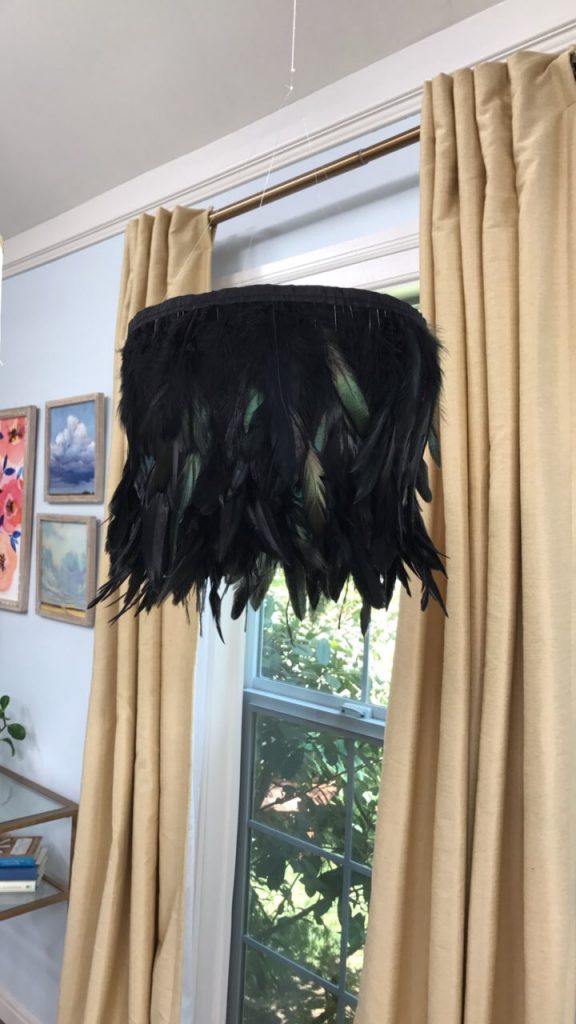
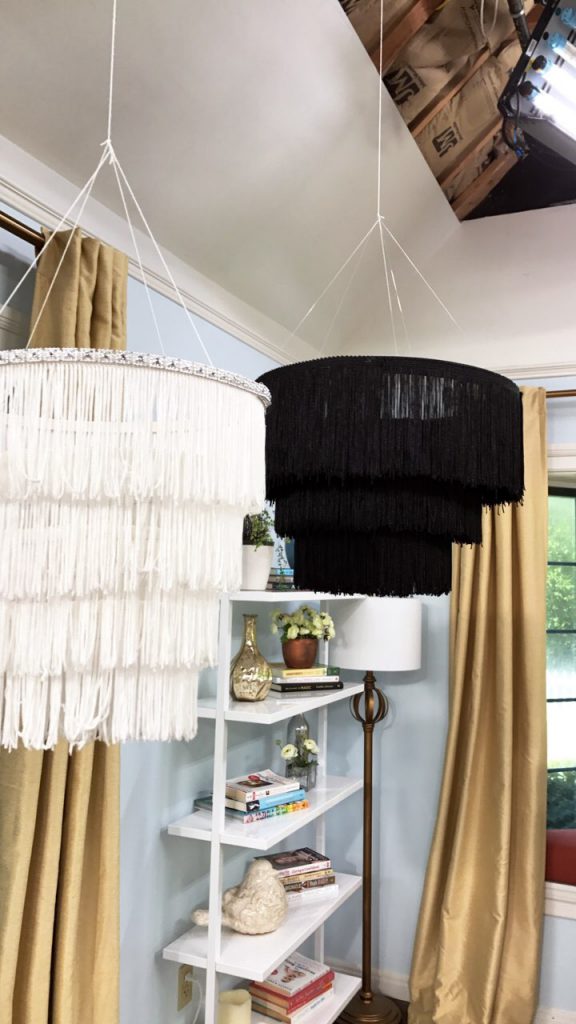
When I think of chandeliers, generally I see dollar signs! Even ones that are simply decorative can be expensive. Enter fringe and embroidery hoops! These chandeliers are simple to make, but completely chic and adorable.
You can choose whatever size you like for these. I have seen embroidery hoops that were as large as 24 inches, and they probably even make them bigger than that. You can find the hoops on Amazon or at a fabric store like JoAnn’s. I also like the idea of getting the fringe in person instead of online to make sure you get the kind you like. Fringe is a hard thing to pick out online without touching it.
A couple great tips:
*Paint the hoops the same color as the fringe you plan to use
*Use a ruler to measure out the length of the yarn between each hoop (more info on that below and in the video, coming soon)
*Do at least two layers of fabric to make the chandelier full; it won’t have as great of a look if it doesn’t appear full
DIY Fringe Chandelier
Materials
-
Embroidery hoops in large, medium and small sizes
-
glue gun
-
Fringe fabric trim
-
Paint, preferably the same color as the fabric trim
-
Thin decorative fabric trim; optional
-
String
Directions
1) Paint the embroidery hoops and allow to dry
2) Tie the string to the smallest hoop and repeat so you have 4 or 5 long strings all around the hoop
3) Measure out the same distance on all the strings, about 4 inches or so depending on the fabric, and tie to the medium hoop
4) Repeat to tie the big hoop
5) This will create the chandelier look
6) Tie all the strings together at the top so that the chandelier is able to hang from the ceiling
7) Use a glue gun to attach the fringe fabric trim to all three hoops
8) Cut the trim if needed to desired length
DIY Fringe Chandelier
DIY Fringe Chandelier